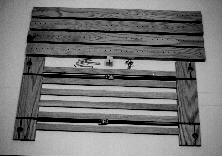
| Locate and identify End Frame
Parts: (4) Legs: 1 5/16" X 3" X 41 1/4" (2) Block & Slat Assemblies: (8) Screws: 1/4" X 3" (24) Washers: 1/4" Flat (5/8" diameter) (1) Gauge Pin: 1/2" diameter "End Frame or Leg to Rail" (5) Mission End Frame Gauges Note: If you bought the optional Hutch Shelf, your rear Legs will be 70" tall instead of 41 1/4". If you bought the Standing Desk, all 4 Legs are 70" tall.
|
 |
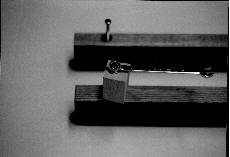
| Install 2 screws with 3
washers each, into sides of 4 Legs as shown. Wax screws prior to
insertion. Use gauge Pin to set height of screws.
Gauge Pin, (marked "End Frame Only")
|
 |
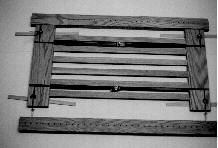
| Select Legs marked "RR" (right rear) and "RF" (right front). Legs are marked on the bottoms. Legs for newer Desks may not be marked on the bottom. These Legs can be used for any corner of the Desk. Arrange legs so that the 32, 3/16" holes in each Leg are facing up. Arrange Block & Slat Assembly so that 1" diameter pocket is likewise facing up. Make sure bottoms of Legs are pointing same way. Place Spacer Bar under each corner of Block & Slat Assembly Drop Legs with Screws onto Block & Slat Assemblies as shown.
|
 |
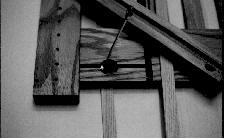
| Make sure both washers for
each screw are located under the head of the screw, and not between the
wood parts. Tighten Screws.
A Stationary Slide (15/16" X 1 7/8" X 25 1/2") can be placed diagonally across Leg and Block while tightening. Place 5th Spacer Bar under Stationary Slide. Apply pressure to Stationary Slide with one hand, while tightening with the other. This will keep the Block & Slat Assembly centered on the Leg. Assemble left End Frame
|
 |